Classify Documents
Classify automatically sorts analyzed data into categories you've defined ahead of time. This page explains how to register categories and how to connect the categories you've registered to a workflow's Classify block.
Classify screen
Select Workflows in the left sidebar, then click Classify in the stage bar at the top.
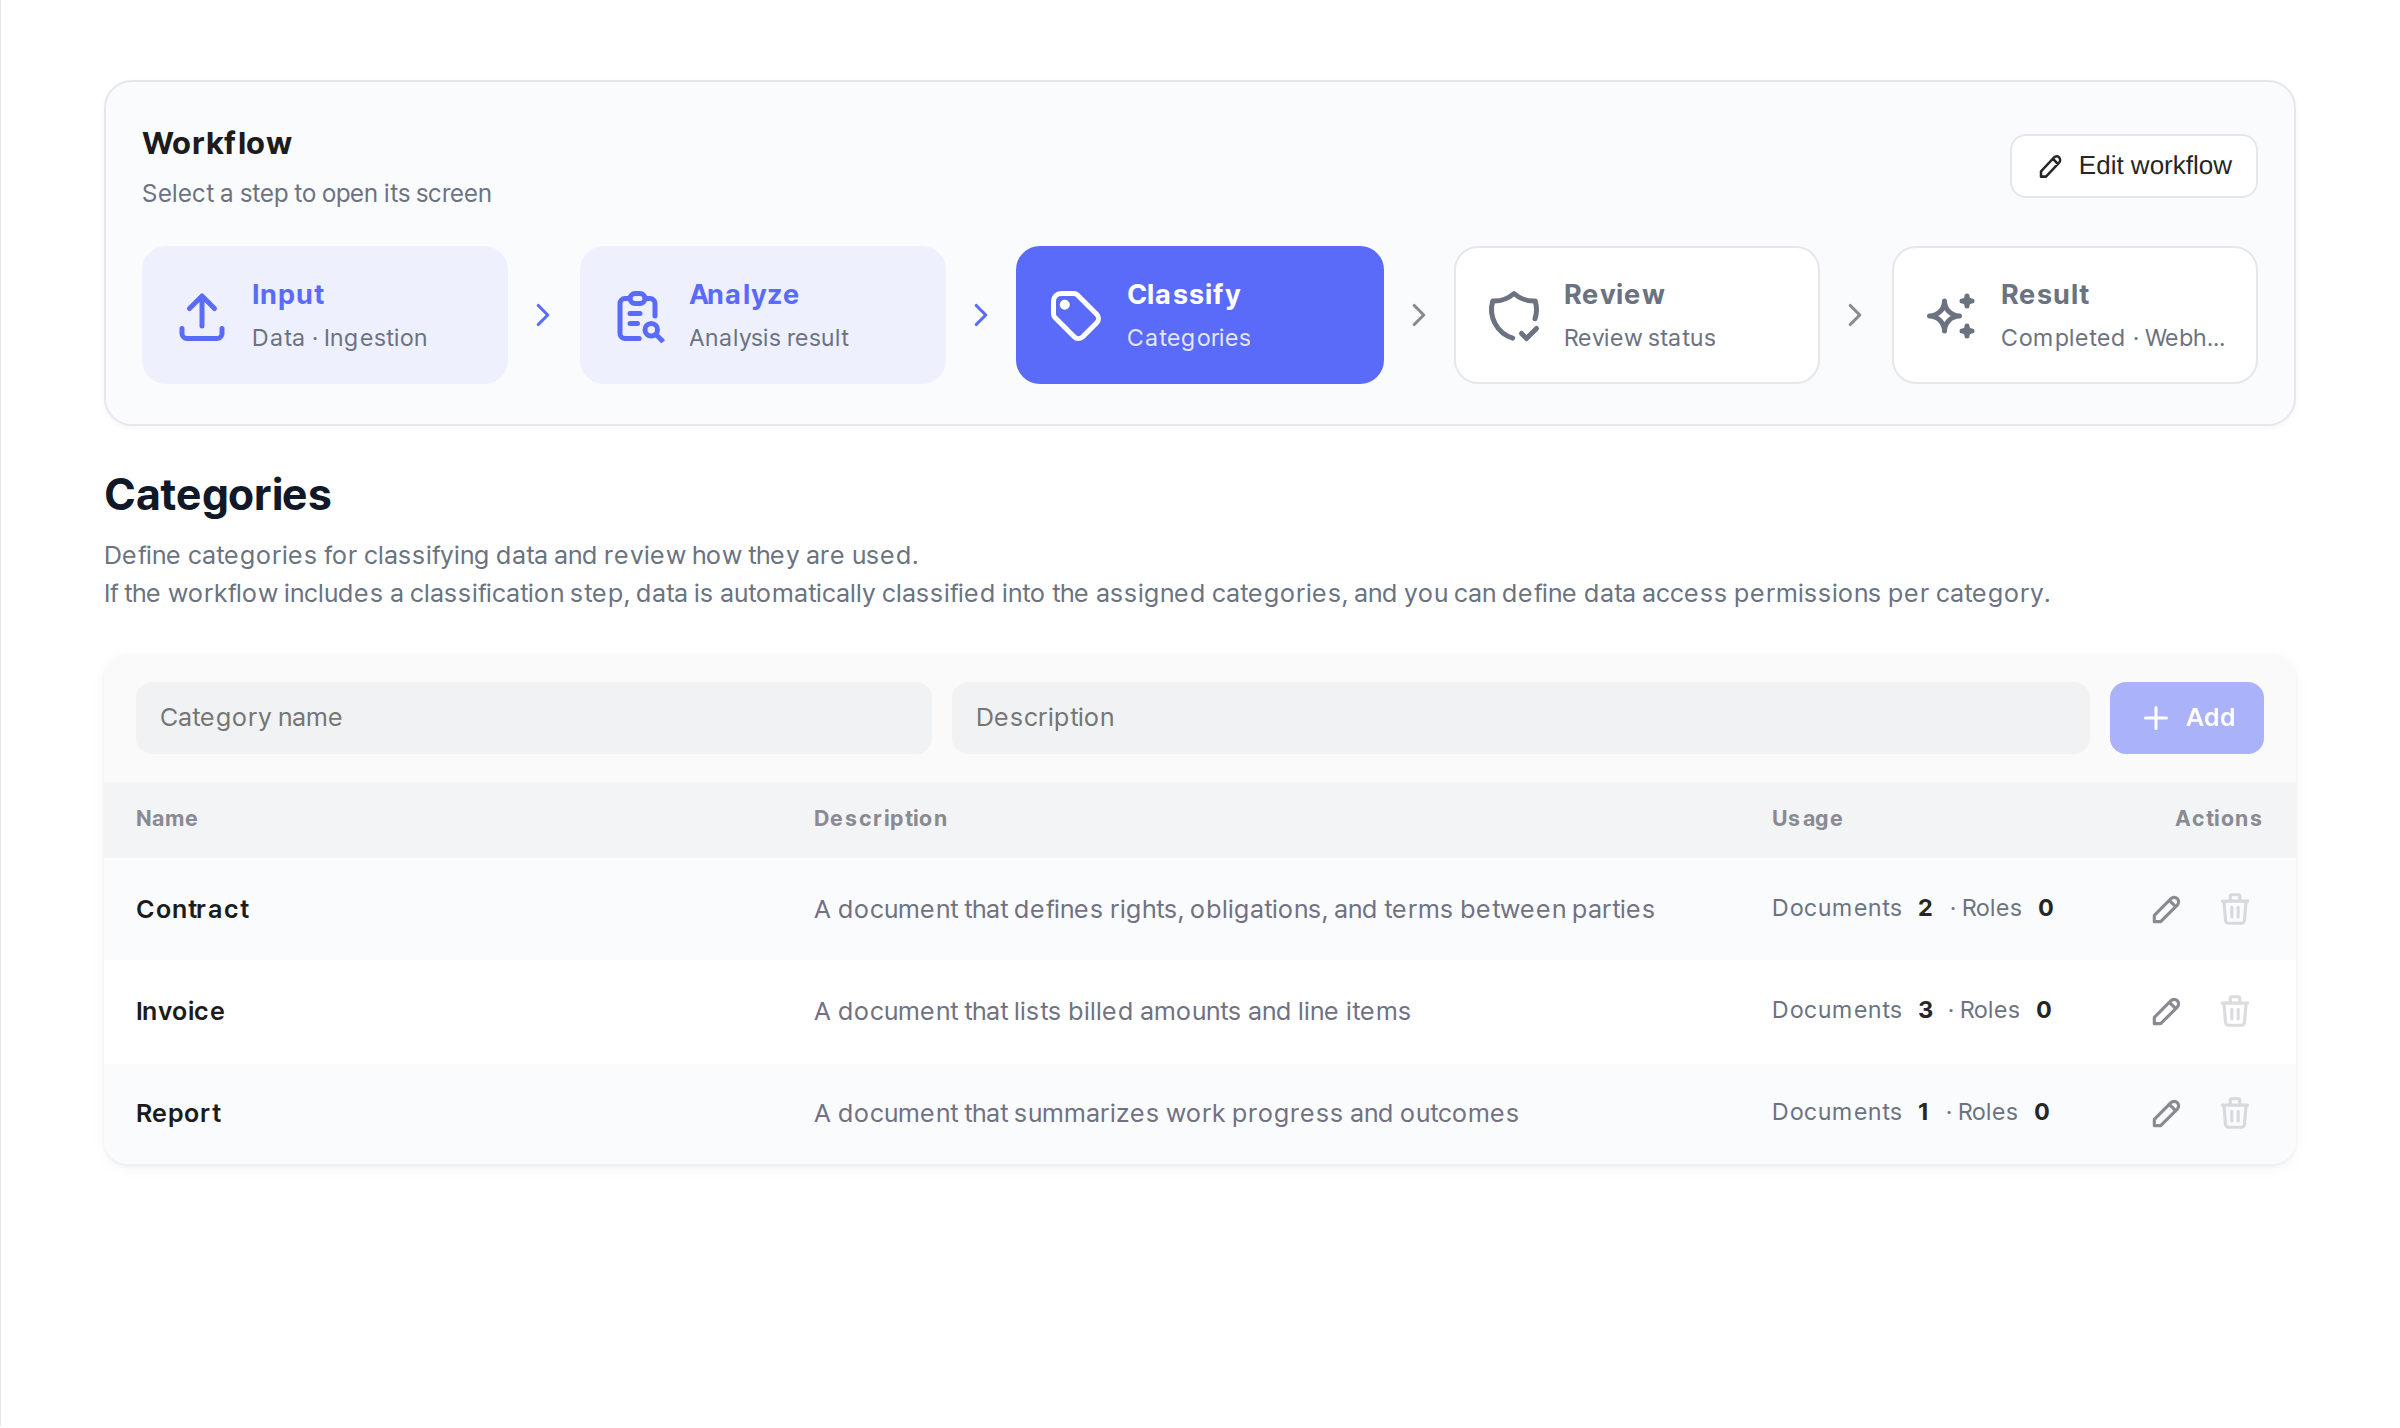
The top of the screen holds a registration form with Name and Description fields plus an Add button, and the list of registered categories appears below it. When there are no categories yet, the list shows "No categories yet." with the sub-message "Add your first category above."
Category list
Categories you've registered appear as a list.
| Item | Description |
|---|---|
| Name | The category name. This is what you see when selecting categories in a Classify block. |
| Description | What the category covers. It's the basis for deciding which documents belong here. |
| Usage | Whether this category is connected to a Classify block in a workflow. |
| Actions | Edit or delete the category. |
To add a category, fill in the Name and Description fields in the registration form at the top of the screen, then click Add. The Classify block references these categories, so create them here first.
Connecting a Classify block
Registering categories doesn't start classification by itself. You need to add a Classify block in the workflow editor and select/save your registered categories inside that block before classification runs. See Create a Workflow for how to build a workflow and configure its blocks.
Checklist
The dashboard's Checklist includes a Run classification (optional) item where you can confirm three things, in order:
- Did you add a category list?
- Did you add and connect a Classify block to the active workflow?
- Did you select and save categories in the Classify block?
Classify is an optional stage. If a workflow doesn't include a Classify block, the analysis results skip classification and move straight to Review or Result.
Next Step
- Review Documents →: How to check and correct classification/analysis results.