Upload Files and Run
This page walks you through the full flow of uploading files, running a workflow, and getting the results. Finishing this step completes the basic end-to-end scenario for AI Data Foundry.
Prerequisites
- You have at least one project from Create a Project.
- You have at least one runnable workflow inside that project from Create a Workflow.
- You have the file(s) you want to analyze ready (HWP, DOCX, PDF, images, etc. — see Supported Formats).
Step-by-Step
In the project's left sidebar, click the Workflows menu. A workflow step bar (Input → Analyze → Classify → Review → Result) appears at the top, and the Data tab opens below it.
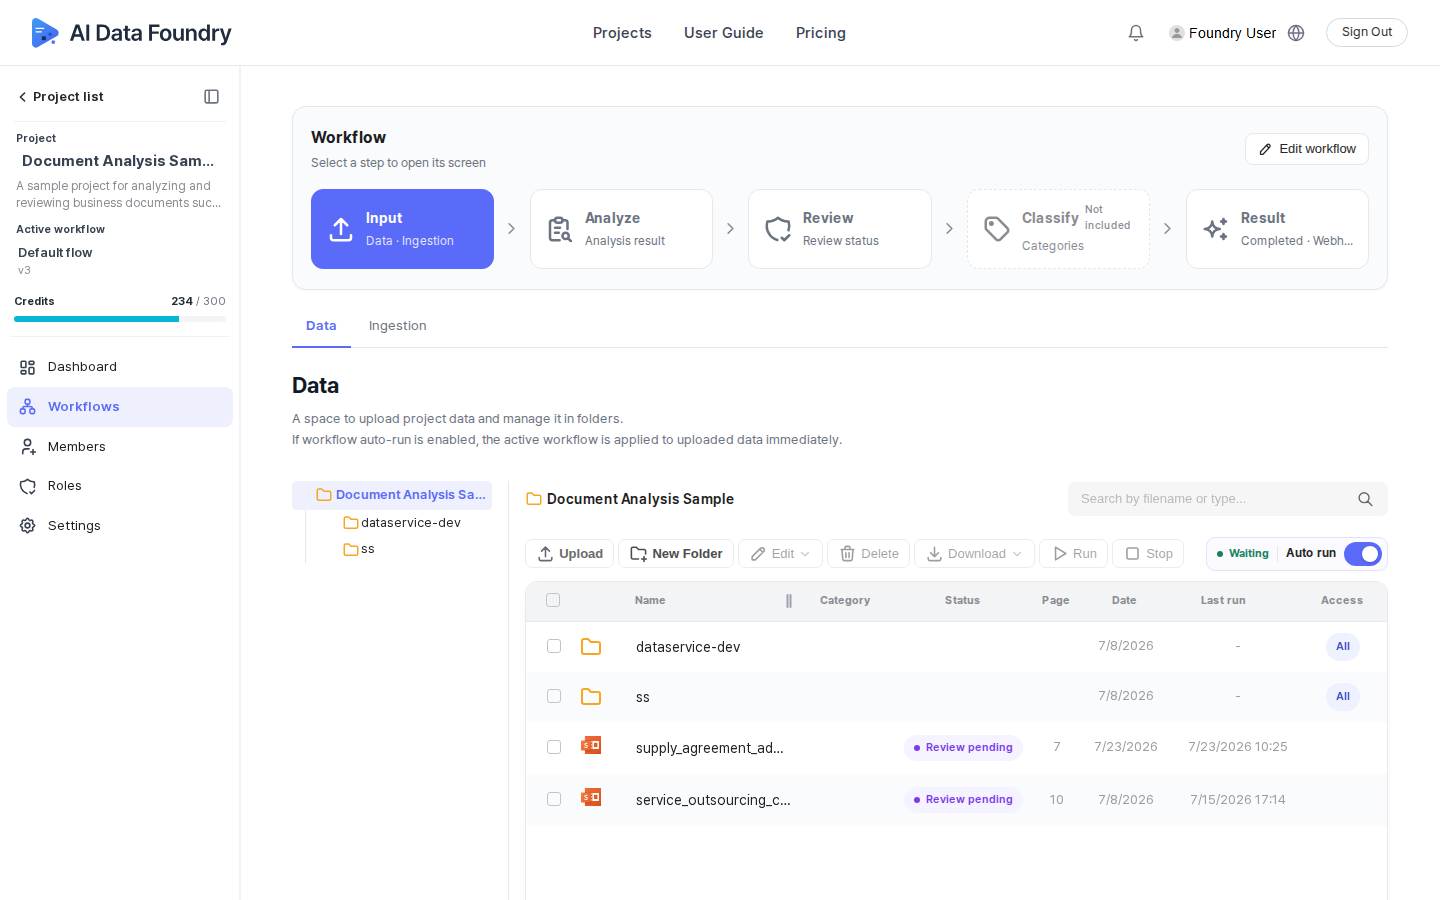
Drag and drop the files you want to analyze into the data area, or use the upload link (or the Choose File / Choose Folder button). Various formats such as PDF, CSV, XLSX, and TXT are supported.
Once uploads finish, select the file(s) in the list. Use Delete, Download, or Rename to manage them if needed.
There are two ways to run the workflow.
- Auto run — turn on the Auto run toggle on the data screen (or on the dashboard) so the active workflow is applied immediately to any data uploaded from then on.
- Manual run — select the file(s) in the data list, then click the Run button in the toolbar. You can cancel it with the Stop button in the same place while it's running.
Once the run finishes, check the processed files and their status on the Result step of the workflow step bar.
Running a workflow requires credits. You can purchase credits on the Pricing page.
Credits are included with your AWS Marketplace subscription. To check your subscription and billing, see AWS Subscription & Billing.
If your credits run out, execution may stop. You can check your remaining credits in the credits gauge on the left sidebar.
Next Step
- Back to the Quickstart hub: Revisit the overall getting-started flow.