Screen Tour
A project screen is made up of three main areas. The middle is where you work on the project and check its progress, and the sidebar on the left moves you between screens inside the project. The top menu (GNB) gives you shared features such as the project list, your account, and notifications.
Dashboard
The first screen you see when you enter a project. It brings together what you need to get the project started and to check how it is going.
The sections below walk through the dashboard from the top down.
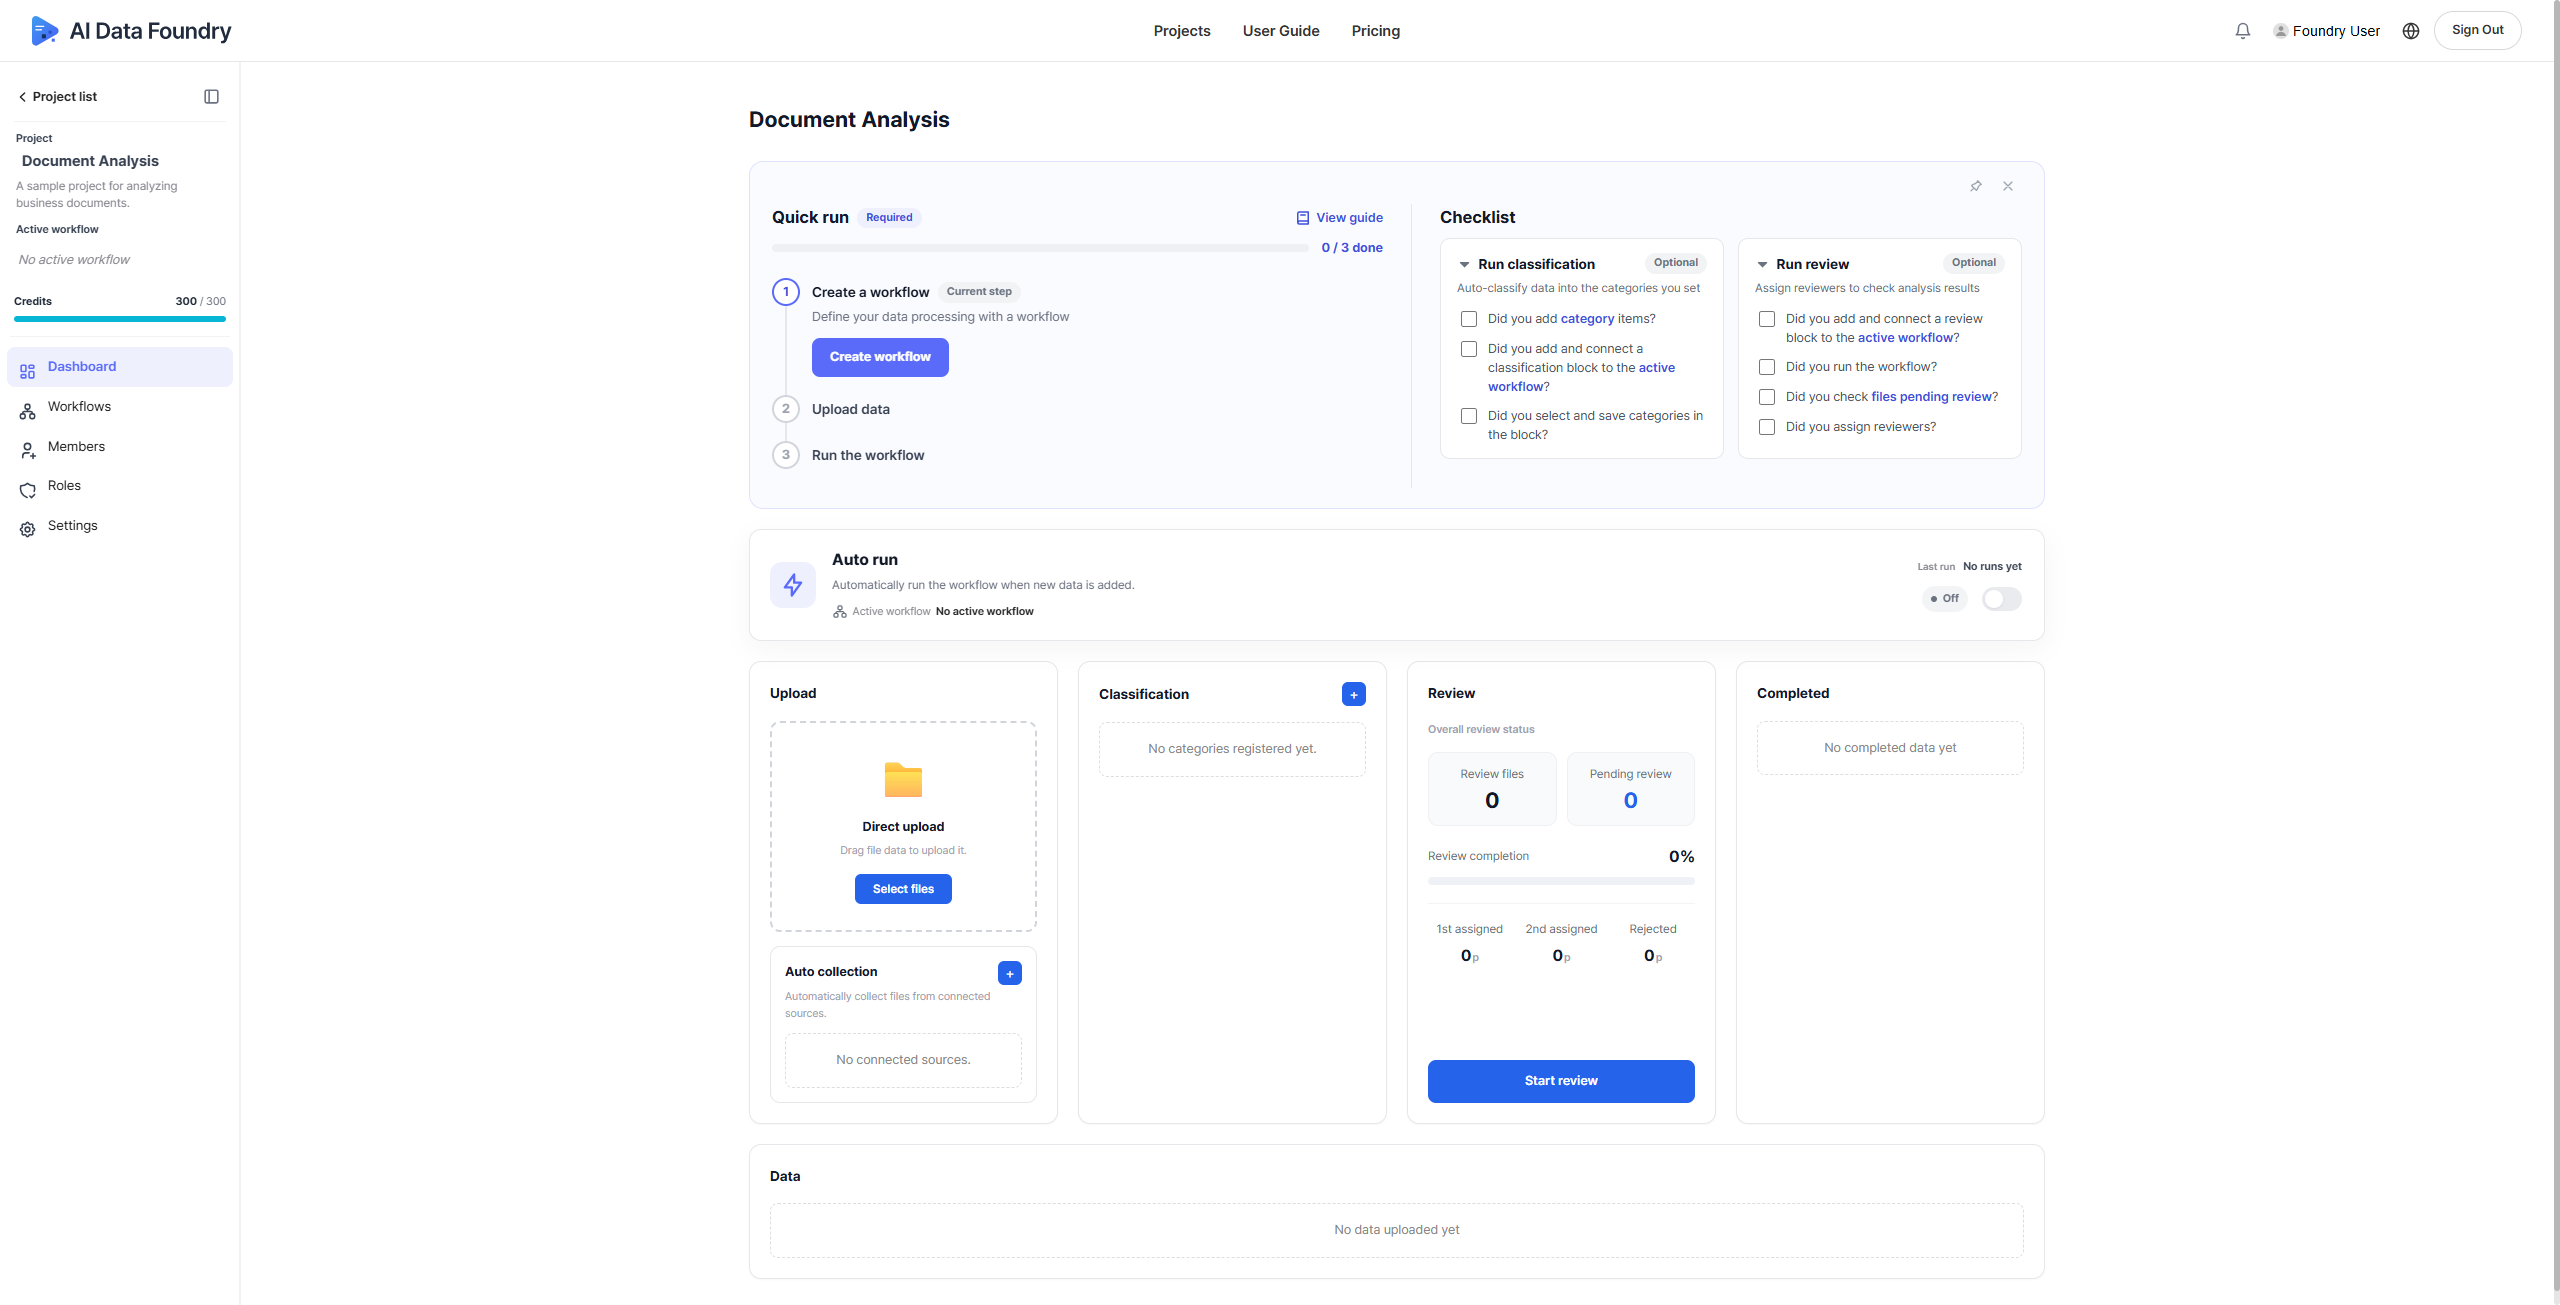
Quick run · Checklist
A guide for when you are just starting a project.
Quick run walks through the steps you need to reach your first result, and Checklist lets you confirm what has to be ready for classification and review.
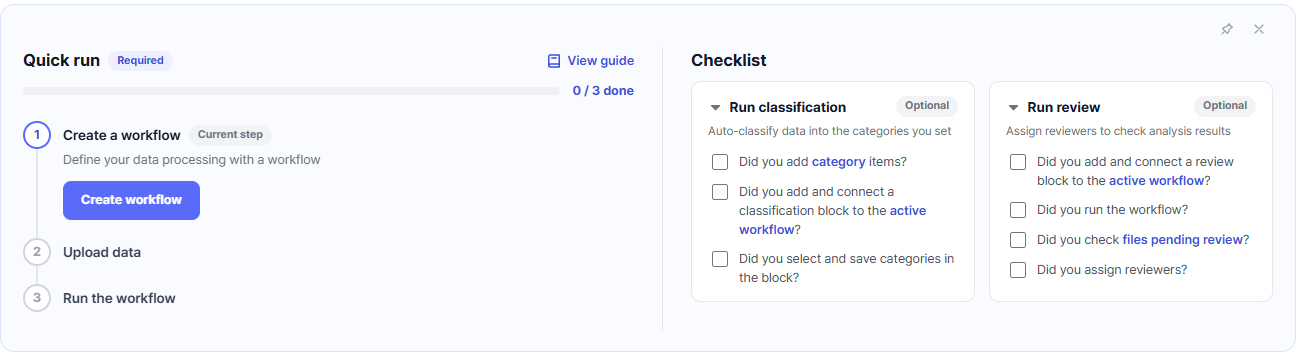
Quick run
Walks through the tasks a new project needs, in order. Follow along and you can see your first result.
- Create a workflow — start with the Create workflow button.
- Upload data
- Run the workflow
Progress appears as 0 / 3 done. The Required badge marks the steps needed before you can use the project, and the Current step badge points to the step to do now. Press View guide to open the guide for that step.
Checklist
A checklist to refer to while you set up classification and review. Work through each item and you complete the setup those features need.
| Item | Steps |
|---|---|
| Run classification(optional) | 1. Add category items 2. Connect a classification block to the active workflow 3. Select and save categories in the block |
| Run review(optional) | 1. Connect a review block to the active workflow 2. Run the workflow 3. Check files pending review 4. Assign reviewers |
The buttons at the top right of the card change how the checklist is displayed.
- Float — shows the checklist as a panel floating at the bottom right of the screen. Collapse that panel with and close it with .
- Don't show — hides the checklist from the dashboard. To show it again, press Show checklist.
The checklist is not required. It is there to suggest what to do first when you are starting out, and hiding it does not affect using the project.
Auto run
Turn on auto run and the active workflow runs automatically whenever new data is added.

The banner also shows the current active workflow and the last run time.
Status cards
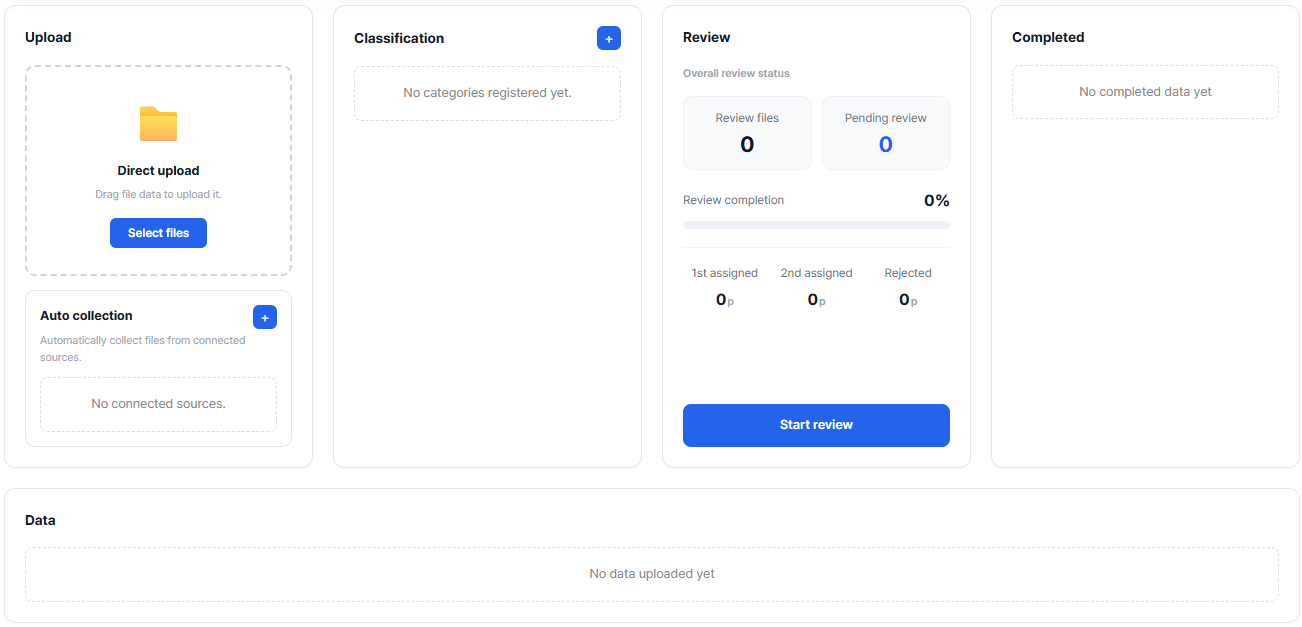
Shows the project's progress stage by stage. Check how much data sits at each stage and carry out what you need right there — uploading files, adding a category, starting review.
| Card | Description |
|---|---|
| Upload | Upload files, or collect them automatically from a connected external source. |
| Classification | Check the number of documents per category and add a new category. |
| Review | Check the review status (review files, pending review, completion rate, assignments per round, rejected) and start a review. |
| Completed | Shows data that has finished processing. |
| Data | Shows the data uploaded to this project. |
Sidebar
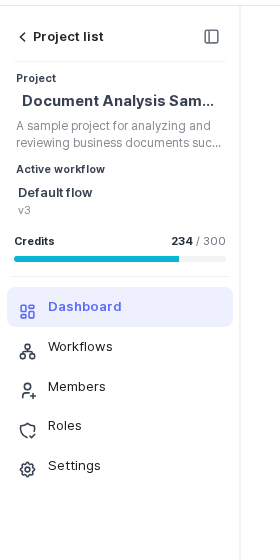
The sidebar holds this project's basic information and its menu. Every screen inside the project opens from that menu.
Project information
- Project list — leaves this project and returns to the full list.
- Project name · Active workflow — below the project name, shows the workflow currently used for auto run. If no workflow is set, it reads "No active workflow".
- Credits — shows credits as
234 / 300, meaningremaining / total limit. The gauge below the limit reflects the same ratio. Hover over the gauge to see the credit types.
Menu
| Menu | Screen it opens |
|---|---|
| Dashboard | The entry screen described above |
| Workflows | The project's data and workflow screens |
| Members | Invite and manage the members in this project |
| Roles | Set the permissions granted to each role |
| Settings | Basic settings such as the project name and options |
Workflow screen
Selecting Workflows in the sidebar opens the workflow screen. There, the step bar lets you move between the Input → Analyze → Classify → Review → Result screens as you work.

If the active workflow has no classification or review block, that step shows a Not included badge.
| Screen | Description |
|---|---|
| Data | The files you have uploaded |
| Ingestion | Settings for collecting files automatically from external sources |
| Result | Processed result files (Name · Category · Status(log) · Pages · Completed at · Result format) |
| Webhooks | Webhook subscriptions that send results to external systems, and the delivery history |
To change the workflow, press the Edit workflow button at the top right of the screen.
Top menu (GNB)
The top menu (GNB) is always visible, on every screen. It provides shared features such as moving between projects and managing your account.

| Menu | Screen it opens |
|---|---|
| Projects | The project list |
| User Guide | This set of documents you are reading now |
| Pricing | Buying credits and managing your subscription |
| Subscription & Billing | Checking your AWS Marketplace subscription and billing — AWS Subscription & Billing |
| Notifications | Processing completed, invitations, and review requests |
| Profile | Checking the signed-in account and account settings |
| Language | Changing the display language |
| Sign Out | Signing out of the current account |
Next steps
- Quickstart →: the five-minute path from uploading one document to getting a result
- Workflow Overview →: the order in which a workflow processes data, and the basic concepts